Adventures in quilt rescue
October 2024
Covering Quilts
Adventures in quilt rescue
by Sandra Starley
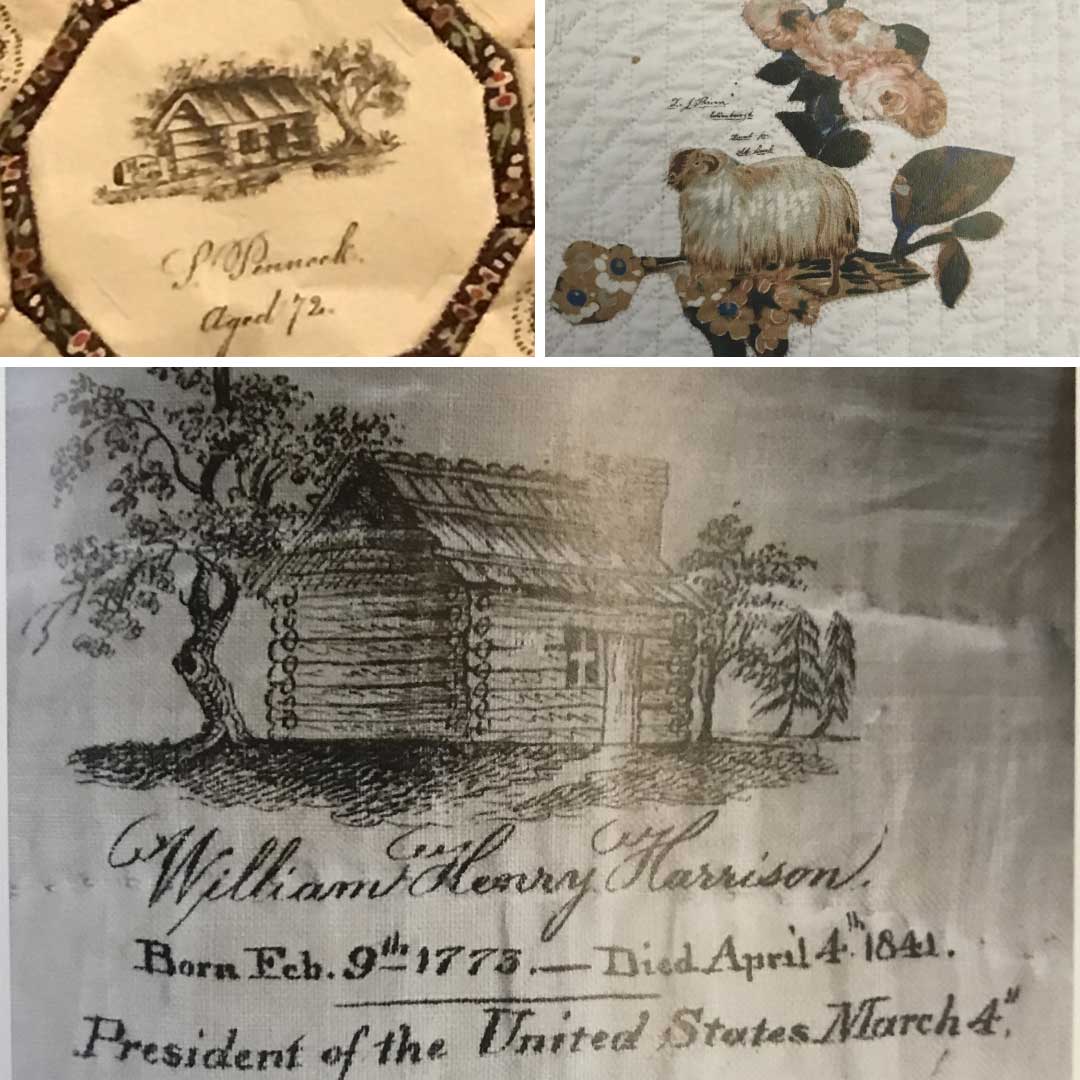
Several years ago, I acquired a funky leaf appliqué quilt from an online auction. I put in a single small bid, then forgot about the item. I was surprised to find that I was the new owner, but I was excited to see if my hunch about the quilt was correct from just a few little pictures. It appeared to be a mid-1800s quilt with signature stamps – my favorite type of quilt and my collecting specialty. The auction listing gave no information about the quilt, its origin, date, etc – not an uncommon occurrence given the dearth of information that is attached to most antique quilts. However, in this case, the quilt had a great story to tell if the auction house had given it even a cursory glance. This applique quilt is a signature album quilt complete with lots of names, some dates, and every block identified with the town where the quilt was made!
When I received the quilt, I started examining the blocks and saw the names, dates (1848), and the town of origin: Barnegat. A quick online search of a few names confirmed my guess of Barnegat, NJ, A.K.A. the Jersey Shore. So, I had what appeared to be an antique signature quilt from New Jersey that was 170 years old, but something was amiss. Some of the signature stamps looked like they had been outlined with modern ballpoint pens. The quilt was not quilted but instead tied with yarn all over the blocks in a garish treatment for such a great quilt. Not something that would have been done by the original makers and not a period quilt finishing practice. Speaking of finishing, the edge was done with a lovely knife edge, a difficult method not usually seen in the 1840s.
Then I examined the quilt backing: plain bleached muslin. Plain muslin backings were not unheard of but not usual for the era of the blocks. On closer inspection, I found the unmistakable sign of feed/food sacking (cloth product bags), which is the stitching line along the fabric edges. Cloth commodity bags had a chainstitch along the top edge, which left visible lines; a similar stitch is used now on large dogfood bags. This moved that fabric into the 1900s.

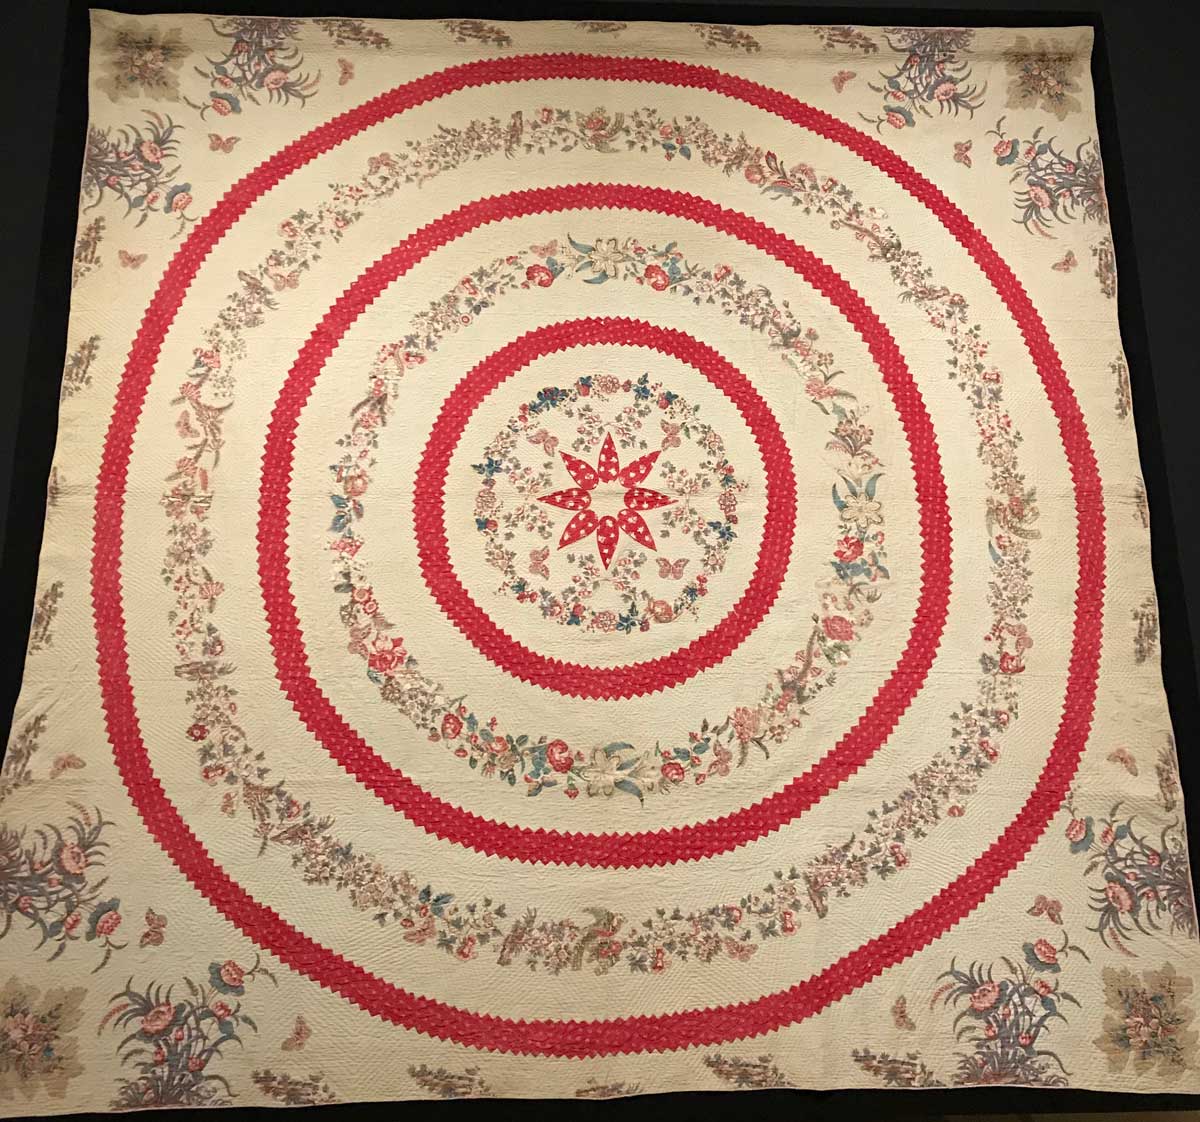
Applique quilt (before rescue at auction). Dated 1848, Barnegat, NJ, from the Sandra Starley Collection. (Image courtesy of the author)
I believe that the blocks were made in the 1840s and the top pieced at that time. The blocks are sashed with a lovely 1840s Turkey Red fabric. For some reason, the top was set aside around 1850; perhaps it was made for a wedding that was called off or as a gift from someone who passed away prematurely. It was finished at a much later date, probably the 1940s. I spent a number of hours rescuing the beautiful top from the hideous yarn ties and the heavy fluffy wool batting, and it is now one of the stars of my collection. I did not remove all the ties because they are a part of the quilt’s history, but I did not want them to distract from the signature stamps and amazing antique fabrics.
The quilt continues to pique my curiosity … it appears to be related to a couple of other New Jersey quilts in my collection and other collections as well. And the gorgeous graphic fabrics may have come from a relative’s calico factory owned by the Shreve family, Shreveville, Burlington County, NJ. Stay tuned as more secrets are revealed. And if you have ever seen this applique leaf block before or know about Shreve quilts, please let me know
Sandra Starley is nationally certified quilt appraiser, quilt historian, and avid antique quilt collector. She travels throughout the U.S. presenting talks on antique quilt history, fabric dating classes and trunk shows as well as quilting classes. Learn more at utahquiltappraiser.blogspot.com. Send your comments and quilt questions to SandraStarley@outlook.com